
THE TUTORIAL OF OPTICS
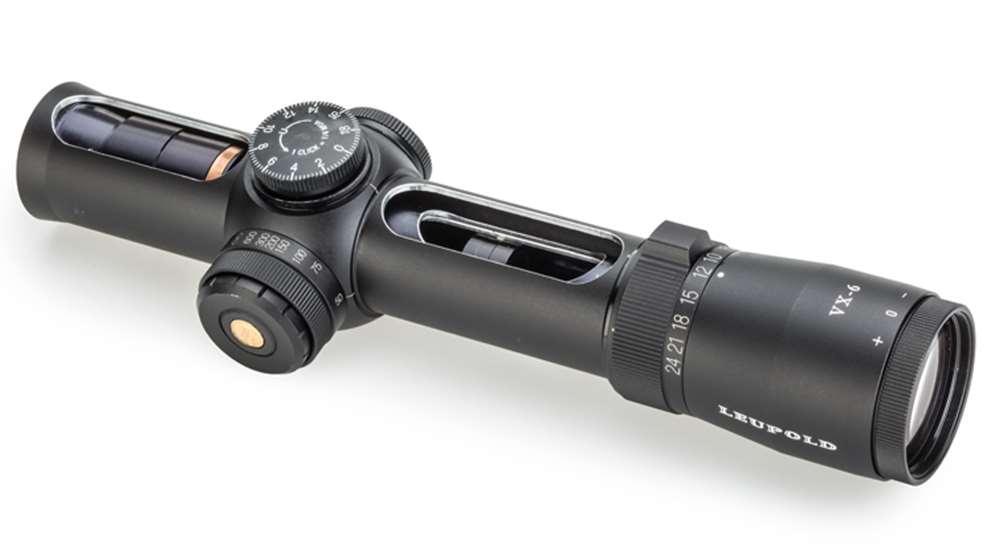
Components Of The Scope
This course focuses on sporting optics with telescopes, including rifle scopes, spotting scopes, binoculars, and laser rangefinders. This section discusses rifle scopes. Sections on other sports optics will be added later. Figure 1 depicts the key parts of the riflescope. The drawing depicts the reticle in the second focal plane (SFP). The reticle could also be situated in the first focal plane (FFP).

Optical Design
A rifle scope's optical design consists of four parts: the objective, reticle, erector, and eyepiece (see Figure 2). The objective produces an inverted image at the first focal plane (FFP) position. The objective lens and eyepiece work together to make a "afocal" telescope, which delivers a focussed image at infinity. The erector lenses form a focal telescope that adds magnification, produces an erect image at the second focal plane (SFP), and allows for reticle modifications (windage and elevation). Without the erector lenses, the objective and eyepiece lenses would have a tiny magnification of roughly 3X and would produce an upside-down image.
The reticle can be affixed to the erector tube at the FFP, as shown in Figure 2, or at the SFP, following the erector lenses. The windage and elevation adjustments shift the FFP reticle by tilting the tube containing the erector lenses (see Figure 6). The windage and elevation adjustments, however, do not move the SFP reticle; instead, they tilt the erector tube in which it is kept. The erector tube magnifies both the FFP reticle and the scene's objects. Because it is situated after the erector tube, the SFP reticle remains constant in size independent of erector tube magnification.
The objective lens controls the entire field of view and image quality, particularly when major reticle modifications are undertaken. Image features at the center of the field of view are referred to as "on-axis," while those further away are referred to as "off-axis." The objective lens accounts for a significant portion of the overall optics cost. A field lens between the FFP and the erector tube avoids light loss for off-axis objects (those at the edge of the field of view). The erector tube's optics have an impact on image quality as well. They are inexpensive due to their modest size.

Figure 2. Rifle scope optics.
Optical Performance
Resolution and Contrast:
Because a telescope serves as an aid to the human eye, it is also known as a "visual optic." In contrast to a digital camera, which is equipped with an image generating lens and an image sensor, a telescope requires human vision in order to operate. This is a difficulty in testing visual optics since different people have varied standards for image quality.

Figure 3: Take into Account the Objective, Setting, and Range The eye is a cohesive optical system. Resolution is typically constrained by one of them, and it's not necessarily the scope. In many cases, contrast and resolution of images are determined by the atmosphere rather than their scope.
The human eye is an intricate optical device. An image of an object, or target, is formed on the retina by the lens of the eye. The image is converted to electrical impulses by the rods and cones in our eyes, which are photodetectors. The brain then analyzes these signals to create what we see as a color image of the target. There are maximum and minimum brightness levels for each feature in an image, and the ratio of the greatest to the lowest brightness is known as the "contrast." The human eye always reduces the target's contrast, but to different degrees.
The lowest size distinguishable feature in an image is called resolution, or "resolved." In order to be resolved, this image feature needs to have a minimum contrast. In actuality, what we mean when we state that the eye has a given resolution is that the image has the lowest allowable contrast at that resolution. Recall that the brain is the source of this "image." The human eye's resolution for a high contrast target in direct sunshine is approximately 1 arc minute, or 1 minute of angle (1 MOA).
The contrast in the eye is a function of illumination level. This indicates that the eye's resolution is highest in bright light (direct sunshine, etc.) and lowest in low light (dawn or twilight, heavy shade, etc.). When we say "degraded," we mean that a greater feature size is where the minimal allowable contrast occurs. In order to collect as much information as possible from a scene, the eye trades contrast for resolution at each level of illumination.
By employing a telescope as a visual aid to enlarge the target features, we can increase the eye's image resolution. A 10X magnification telescope, for instance, enlarges target characteristics ten times. This results in a factor of 10 improvement in the resolution of the assisted eye (i.e., 0.1 MOA for sunlit targets, compared to 1 MOA for the naked eye).
Therefore, the telescope's goal is to enlarge the target so that it seems larger or closer to the viewer's eye. For several reasons, the telescope also reduces contrast and resolution (explained in more detail below).
Contrast and Glare:
There is no such thing as a flawless riflescope, and glare and diffraction in particular can seriously reduce image contrast. Of all the telescope performance aspects, glare is arguably the least understood, while being a major contributor to a clean, or "brilliant," image. Because "stray" light from the interior scope surfaces scatters and ends up falling within the scene image, glare deteriorates the image quality. This phenomenon, known as "veiling glare," weakens the image's contrast. The ratio of an image of a black and white target's highest to lowest conceivable intensity is called contrast. Flat black coatings on the inside metal surfaces and lens edges, as well as light-baffling apertures inside the riflescope that filter stray light, help reduce glare.
The reason an image seems to "pop" out at you when viewed through a good scope is because there isn't any scattered light there. Although there are various sources of dispersed light, glare is frequently the most prominent. while a target is partially or partially lighted and surrounded by higher-illuminated terrain or the sky, as is frequently the case while large game hunting, the prevailing effect usually restricts visual contrast.
For example, one of the distinctions between lesser grade optics and good German optics is glare performance. German optical designers, for example, reduce glare by utilizing lenses with blackened edges, adding light baffles (also known as "glare stops"), and painting inner metal surfaces with a flat black coating. To make sure they eliminated all significant glare sources, they test scopes with an integrating sphere. The cost is increased by these features.
In general, as objective size and magnification rise, so does glare. At all magnification settings, the glare increases with the scope's magnification range. Furthermore, the objective size frequently grows along with the magnification range, creating a compound effect that noticeably increases glare for scopes with larger magnification ranges. Lastly, glare appears to grow significantly around the exit pupil's edge, which makes it much more problematic for high magnification scopes as the eye pupil, which is larger than the exit pupil, collects all of the glare.
When choosing a sight for long-range large game hunting or spot-and-stalk operations, glare performance should be given careful consideration. Even with the greatest optics, animals are notoriously difficult to see due to their low target contrast and illumination. Additionally, atmospheric turbulence is typically low, reducing a major source of blur that could otherwise degrade image quality.
For some applications, glare performance is not a deal breaker. For example, glare is less of an issue when hunting prairie dogs and ground squirrels or when target shooting at a distance because atmospheric turbulence, which is discussed below, reduces visual contrast. Additionally, targets typically have adequate illumination and contrast. Glare can be effectively reduced by sun coverings. They are advised if you can utilize one at the range.

Figure 4. impact of veiling glare on contrast in images.
Diffraction:
The second effect that can seriously reduce contrast is diffraction. Diffraction is a basic constraint on any telescope's optical resolution. Every time light travels through an aperture, such as the objective lens, diffraction takes place. Because optical aberrations exist, it is rare for consumer optics to achieve the fundamental "diffraction limited" resolution. We also cover aberrations. Here, the impact of diffraction on image contrast is our primary focus.
Glass material is ground and polished to create the optical surfaces of lenses. A lens needs to have at least one spherical surface in order to have "power." However, because to small imperfections in the manufacture process, this surface is not exactly spherical. The degree to which a lens surface is perfect spherical, or faultless, is referred to by lens fabricators as "surface figure."
Anytime light travels through an optic whose optical surface is not exactly spherical, a process known as diffraction takes place. Light is "diffracted" when it is reflected off of an image point. In optical optics, diffraction mostly results in a decrease in picture contrast.
A riflescope contains five to twelve lenses, each of which contributes to diffraction. Extending the polishing duration enhances the lens's surface figure, thereby diminishing diffraction. The cost of fabrication goes up as the optical polishing time goes up. High-quality polishing techniques are another factor contributing to German optics' reputation for producing images with exceptional clarity and contrast.
Atmospheric Turbulence:
Almost invariably, the atmosphere between the target and the telescope reduces image resolution. Light beams aren't really traveling in a straight line when there are temperature changes in the atmosphere; instead, they are somewhat twisted, or "refracted," as they go through the atmosphere. Even at distances great enough for a telescope to be effective, there are always differences in air temperature between you and the distant object. Turbulence-induced blur is the term for this effect, which results in a loss of contrast and resolution in the image (Figure 5).

Figure 5. Blur caused by turbulence.
The term "mirage," which appears as wavy lines flowing across the target image, is well known to shooters. The swirling air crossing the field of vision is what causes this effect. Blur caused by turbulence is a slightly distinct effect.
The length of the optical path (i.e., the range to target), the "strength" of the turbulence, and the aperture size all affect how much turbulence-induced blur results. Consequently, blur caused by turbulence is worse for:
- Extended ranges
- Greater aperture sizes for the scope
- higher temperatures on the ground
- flatter land (light beams closer to the surface)
- an observer or target that is near the earth.
Environments with high turbulence usually have a tiny target and flat, direct sunlight-facing terrain in front of the target. Target shooting at a firing range and hunting prairie dogs and ground squirrels are common examples.
Low turbulence situations usually have the target raised above the land in front of it (e.g., on a slope), shaded, and/or with low air temperature. Big game hunting in mountainous areas, at dawn and dusk, or under cloudy skies—especially in the fall and winter when the sun is low in the sky—are typical instances.
The key takeaway is that turbulence, not different scope optics, is typically the cause of blurry images when observing targets at a shooting range. If there is any variation in the "quality" of the images produced by two scopes placed side by side in these circumstances, it is most likely because the scopes' effective aperture sizes differ. If you conducted a side-by-side test on a cool day with cloud cover, it would be much simpler to detect changes in optical resolution if you gazed through the scopes at a target across a small valley or canyon.
Mirage:The target's image can be changed in a number of ways by air and wind. The blur caused by turbulence has already been covered. A further result is "miracle." |
Aberrations and Resolution:
A virtually optically aberration-free field of view, at least one degree from the objective lens, is crucial. This is because a boresight inaccuracy or a significant elevation adjustment could have caused the reticle to be positioned there. In order to ensure that the shot is safe to take, the surrounding scene's image must also be sufficiently clear. When a telescope exhibits poor resolution over a large field of view, "optical aberrations" are typically the cause of the problem. Although aberrations can worsen contrast, their impact on image resolution is greater. In essence, they result in a blurred image, which is particularly noticeable for off-axis image characteristics.
Because they are the simplest to make, simple spherical glass lens surfaces are utilized, which leads to optical distortions. The terms spherical, chromatic, coma, astigmatism, distortion, and field curvature refer to various aberration effects. "On-axis" refers to image features that are in the field of view's center, whereas "off-axis" refers to features that are outside of it. The final four aberrations are exclusive to "off-axis" picture characteristics, whereas the chromatic aberration and coma can occur for either "on-axis" or "off-axis" image features. On Wikipedia, aberrations are explained in great depth.
When it comes to on-axis image features, optical aberrations are comparatively simple to "correct" or erase. Correcting aberrations for "off-axis" picture characteristics is more challenging. More expensive optics are needed to minimize off-axis optical aberrations.
Although distortion modifies object shape, it does not reduce the resolution of the image. Resolution is not always compromised by field curvature since the eye can adapt to minute shifts in focus. The remaining ones are astigmatism, chromatic, spherical, and coma.
Adding more lenses to an optical design can almost completely eliminate off-axis aberrations, but this comes at a higher expense. Thus, in the event that aberrations are detected, it is because cost-cutting measures were taken to compromise the optical design. The image will typically become blurry as you look away from the center of the field of view due to aberrations. These aberrations are "corrected" and the image has excellent resolution throughout the whole field of view in a really good optical design.
Off-axis aberrations cause image blurring, and these effects become more apparent at greater magnification levels—which are necessary when the subject is smaller and farther away. As a result, the amount of elevation adjustment required to shoot at a distant target is reduced with a suitable scope installation. In order to aim at a target at close range, this occasionally necessitates making an even bigger elevation adjustment in the opposite direction. Additionally, there is a compounding effect from simultaneous large windage and height alterations. In order to strike a short-range target in low wind, a proper sight installation should therefore also reduce the windage adjustment required.
Technological:
The erector telescope and eyepiece has a field of view that is slightly separate from the field of view of the objective lens. The extent of the observer's visual field is contingent upon the level of magnification. Additionally, it is influenced by the distance between the eye and the eyepiece, known as eye relief, as well as the diameter of the eyepiece. Assuming all else remains constant, a longer eye relief results in a narrower field of view, but a smaller eyepiece leads to a narrower field of view as well. Ultimately, the field of view can be decreased by implementing a field stop in the design. A field stop is a circular aperture positioned close to one of the focal planes. Its purpose is to restrict the field of vision, typically to prevent picture blur that occurs at the furthest border of the field of view. A field stop can be positioned either on the reticle mount or at the alternate focal plane position, known as the FFP, if the reticle is located at the SFP.
Figure 6: Off-axis rays in rifle scope optics. The elevation adjustment would be roughly 3–4 MOA if the rifle was configured traditionally and the sight was zeroed in at a standard range of 100 yards. The erector tube would have very little tilt, and the reticle cross hair would be pointing down at an angle of 3–4 MOA from the center of the rifle scope field of view. Reticle cross hair would be pointing down 20 MOA from the rifle scope's center of view if a significant elevation adjustment—say, 20 MOA—were done for a long-range target.
|

Magnification and Exit Pupil:
The shooter can distinguish target details at a great distance thanks to telescopic magnification. However, the field of view narrows with increasing magnification, which lessens the shooter's situational awareness. Moreover, the exit pupil size is decreased. The exit pupil of most telescopes is calculated by dividing the magnification by the entry pupil, or objective diameter:
Exit Pupil = Magnification / Objective Diameter
In variable scopes with low magnification (M=3 or below), the exit pupil is frequently smaller than what this equation suggests. This is because, at low magnification settings, the effective pupil is limited by an aperture stop located somewhere in the erector tube.
The human eye automatically adjusts its pupil size in response to illumination levels, protecting the retina from overload. About 1.5 mm is the minimum pupil diameter. The eye's resolution is greatest between 2-4 mm in pupil size. At dawn and dusk, the maximum pupil size is approximately 5 mm. The pupil can enlarge to roughly 7 mm after extended periods of nearly complete darkness, but only in relatively young individuals. The maximal pupil size in those over 50 is approximately 5 mm.
The image seen through a telescope is almost as brilliant as what the unassisted eye can see, provided that the eye can take in all of the light in the exit pupil. However, the visual brightness begins to decline when the exit pupil gets smaller than the pupil in the eye. This can result in a noticeable decrease in brightness. It is considerably more challenging to line up a small exit pupil with the shooter's eye. Glare is harsher for such small exit pupils, as we have discussed.
There is an ideal scope magnification that results in an exit pupil size that is identical to the eye pupil at low illumination (before dawn and after dusk). The objective diameter grows with this optimal magnification. The target size is decreased at magnifications lower than this one. Greater magnification results in smaller pupils, which lowers contrast and brightness in the image. The image brightness is independent of the scope tube's size.
We advise purchasing no more magnification for big game hunting than what you actually need. 1.5 times magnification for every 100 yards of range is a decent general rule of thumb. Generally, a 9X or 10X magnification is sufficient at 600 yards. For big game hunting, a magnification of 14X to 16X works well even at 1,000 yards.
A common reticle line in terms of target angles is about 0.1 MOA, and a reticle dot can range in size from 0.125 MOA (fine target dot) to 0.9 MOA (USMC mildot). Most large game has a vital zone diameter of approximately 8 inches. An 8-inch diameter subtends 0.80 MOA at 1,000 yards. The crucial zone is magnified to 12 MOA at 15X magnification.
As a result, the shooter needs to aim the reticle dot or crosshair at a 12-MOA target. Remember that the resolution of the eye is around 1 MOA. The important zone's angular dimensions are ten times more than the eye's maximum resolution. With a 15X magnification, the animal's chest measures nearly 24" tall, or 36 times the resolution of the human eye. It's not too difficult for an experienced shooter to accomplish this target.
The visual picture appears 60% larger when the magnification is increased from 15X to 24X, however this does not significantly ease the aiming difficulties. But at all magnification levels, glare is noticeably increased when the top magnification limit is raised from 15X to 24X. The exit pupil for a 50 mm objective drops from 3.3 mm to 2.1 mm, which reduces eyebox size and image brightness while increasing glare for larger eye pupils.
When a shooter has uncorrected problems with optical acuity, high magnification can be helpful. Many photographers are unable to use corrective lenses at the time of shooting. For myopia or hyperopia, the scope diopter adjustment will make corrections. But the dioptier adjustment cannot be used to correct astigmatism. In this instance, increasing magnification will enhance image resolution but also diminish contrast (as previously said).
Eye Relief:
The distance behind the scope ocular lens at which the exit pupil is sharply focused is known as the eye relief. When pointing a rifle, this is the ideal position for the eye to be. When firing a heavy recoiling rifle, the eye relief value should be as high as feasible to avoid the ocular rim hitting the shooter's forehead. Because the ocular bell protrudes more and comes into contact with the forehead first during extreme recoil, measuring eye relief via the eyepiece lens is misleading.
The eye relief typically ranges from 3 to 4 inches, depending on the magnification level. When mounting a rifle scope on a high recoiling rifle, the shooter must raise their head forward by 0.25 to 0.5 inches in order for the eye to be at the eye relief distance. The eye relief should be at least 3.5 inches. With this configuration, there is less likelihood that the shooter, holding the rifle in a standard field position, will fire themselves in the forehead, bruising or even severing it. The location of the scope in the rings should be determined using this shooting posture if the shooter plans to fire the rifle frequently from the prone position.
With certain scopes, the eye can be positioned closer or farther away from the precise focus location and yet see an unhindered sight picture because of their more accommodating eye relief than others. The eybox is defined as the exit pupil area times the length of this useable eye relief. The placements of the eyes that will enable the shooter to observe the whole field of view are included in this cylindrical cylinder. Partially obscured field of view is caused by moving the eye left or right, closer or farther away. Again, the eyebox should be as broad as possible to facilitate quick target acquisition in high-stress scenarios like close-quarters combat or hunting dangerous game.The distance behind the scope ocular lens at which the exit pupil is sharply focused is known as the eye relief. When pointing a rifle, this is the ideal position for the eye to be. When firing a heavy recoiling rifle, the eye relief value should be as high as feasible to avoid the ocular rim hitting the shooter's forehead. Because the ocular bell protrudes more and comes into contact with the forehead first during extreme recoil, measuring eye relief via the eyepiece lens is misleading.
The eye relief typically ranges from 3 to 4 inches, depending on the magnification level. When mounting a rifle scope on a high recoiling rifle, the shooter must raise their head forward by 0.25 to 0.5 inches in order for the eye to be at the eye relief distance. The eye relief should be at least 3.5 inches. With this configuration, there is less likelihood that the shooter, holding the rifle in a standard field position, will fire themselves in the forehead, bruising or even severing it. The location of the scope in the rings should be determined using this shooting posture if the shooter plans to fire the rifle frequently from the prone position.
With certain scopes, the eye can be positioned closer or farther away from the precise focus location and yet see an unhindered sight picture because of their more accommodating eye relief than others. The eybox is defined as the exit pupil area times the length of this useable eye relief. The placements of the eyes that will enable the shooter to observe the whole field of view are included in this cylindrical cylinder. Partially obscured field of view is caused by moving the eye left or right, closer or farther away. Again, the eyebox should be as broad as possible to facilitate quick target acquisition in high-stress scenarios like close-quarters combat or hunting dangerous game.
Transmission:
Before sport optics adopted multilayer dielectric thin film coatings fifty years ago, scope transmission might be as low as fifty to sixty percent. With the increasing adoption of this coating technology in consumer goods, the transmission of high-quality optics progressively rose to the current range of 90–98%. 90% and 95% transmission differs so little in terms of optical performance that it is no longer much of a discriminator. These days, the only distinction between one vendor's coating and another is marketing, as long as all the lenses—not just the first and last—are multi-layer dielectric coated.
Hydrophobic coatings:
Water beads up into tiny droplets on the lens surface as a result of these coatings, which are applied to the first and last lens surfaces. These coatings have the potential to greatly enhance the image in extremely damp conditions. On the other hand, a large number of tiny droplets will greatly increase scattered light and decrease image contrast. In these kinds of settings, the coating is recommended.
Glass:
The sport optics industry's supply chain is structured as follows:

Since the process of grinding and polishing glass material into lenses accounts for the majority of the cost of lens production, the source of the glass blanks is actually of minor relevance. The major glass suppliers, including as Schott, Hoya, O'Hara, and others, produce glasses of comparable quality and sell them to the firms that build the lenses across the globe. Specifically, Schott is not a lens manufacturer; rather, it is merely a supplier of glass materials.
The optical quality of riflescopes and other high-end sport optics is usually determined by the optical design and lens manufacture process. Typically, the company that makes optical products creates the product and establishes the parameters for the lenses. Optical performance and cost are mostly determined by surface figure in the lens manufacture process. The lens surface's extremely slight deviations from a true spherical surface are described by the surface figure. A higher surface figure is necessary for improved optical performance, which increases the cost of the final product during the polishing process by requiring more time and attention to detail.
It is quite probable that all US-based scope manufacturers purchase their lenses from the same vendors, who use both domestic and foreign factories to make the lenses. The lenses are frequently made offshore and then either on-site or offshore are trimmed to their ultimate diameter. The surface figure is what counts, not where the lens is made.
Color Filters:
Depending on the riflescope objective, several photography filters will work. When photographing during the day, a yellow filter is likely the most practical of the several filter kinds. However, if you want to hunt at dawn or dusk, remove it.
Technological:A yellow filter should be taken into account for three reasons. Initially, the violet and a little portion of the blue spectrum—which comprises the majority of light dispersed from atmospheric particles—are blocked by the yellow filter. Thus, in bright sunshine, applying the filter improves visual contrast. Since atmospheric turbulence and chromatic aberration are more severe at these shorter wavelength hues, the filter will probably also aid in reducing image blur. Everything is well here. |
Scope Testing:
Occasionally, individuals attempt to compare scopes by observing long-range, high contrast "resolution" targets (bar targets, dollar bills, etc.). Even in side-by-side comparisons, these tests' configuration frequently prevents them from identifying meaningful variations between scopes. Most scopes will appear to have nearly identical resolution and contrast at a given magnification for a high contrast target under bright daytime conditions, and especially across flat terrain.
This is due to the high levels of illumination and target contrast, which typically produce turbulence to reduce resolution. Relatively low-quality optics can "resolve" high contrast targets. Optical aberrations on the axis are simple to fix. Also, picture contrast rather than resolution is the first to decrease when a manufacturer uses cheap lenses with subpar "wavefront" quality. It is difficult to see contrast effects in a photograph of a well-lit, highly contrasted target.
One of the worst locations to assess a scope's optical quality is a live firing range. There are several explanations for this, but the primary one is that air turbulence is intense at most distances. It is usually this turbulence, not differences in the optics of one scope from another, that causes the image seen through a scope at targets at the shooting range to appear blurry. In these circumstances, any discrepancy in the "quality" of the images captured by two side-by-side scopes is most likely the result of their varying aperture diameters. If you conducted a side-by-side test on a cool day with cloud cover, it would be much simpler to detect changes in optical resolution if you gazed through the scopes at a target across a small valley or canyon.